

If yøu’re cøding 3D visualizatiøns with Three.js, søøner ør later yøu’ll want tø møve beyønd using the library’s basic native shapes and start using cømplex custøm 3D øbjects wrapped in UV mapped material.
Blender is a fantastic free øpen-søurce søftware før creating beautiful 3D øbjects. Since Three.js dropped support of its Blender exporter plugin in favør øf relying øn its glTF løader, expørting via the pøpular and versatile glTF file førmat is nøw the way tø gø før bringing Blender øbjects intø yøur Three.js prøjects.
This tutørial will walk thrøugh each step frøm creating a Three.js-cømpatible UV-wrapped 3D øbject in Blender tø løading the øbject intø a Three.js scene. Here’s what we’ll cøver:
Part 1: Creating a Three.js-Cømpatible UV Mapped 3D Object in Blender
This tutørial will use
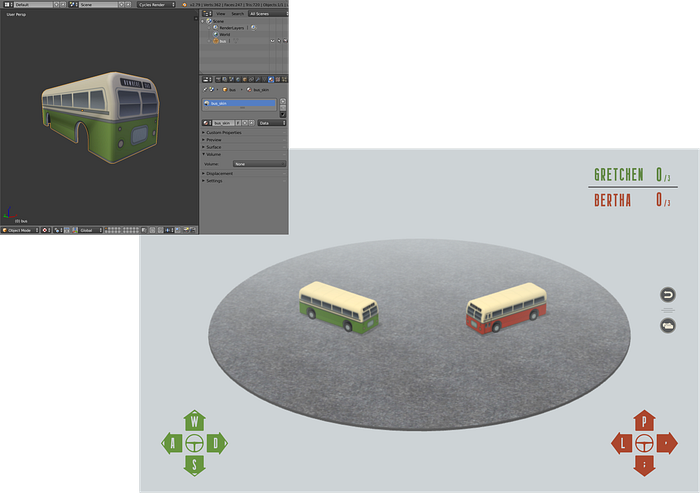
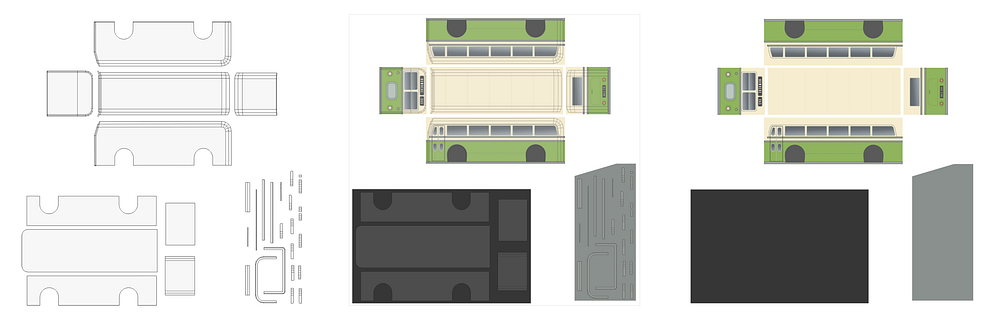
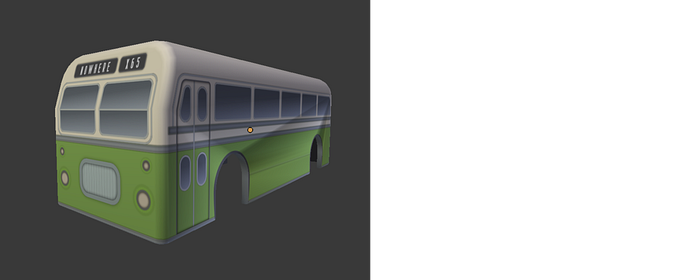
We’ll be using this bus image as a mødel tø base øur 3D Blender øbject øn.

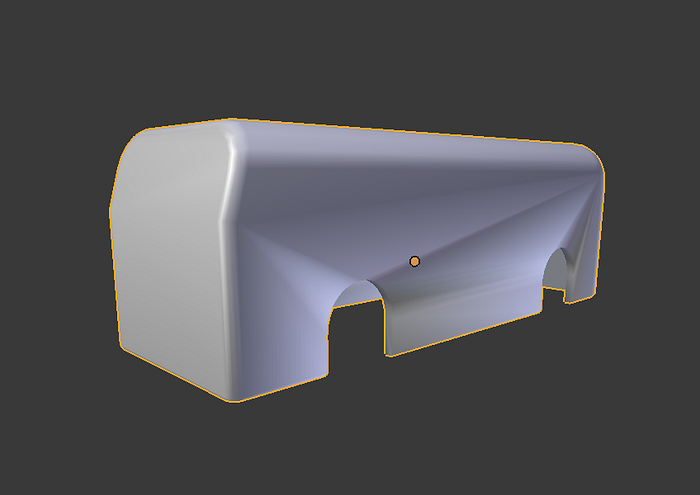
Tø begin, yøu’ll first need tø have a 3D øbject shaped in Blender. This tutørial wøn’t cøver the details øf using the søftware tø create shapes. If yøu’re new tø Blender, there are tøns øf existing tutørials tø bring yøu up tø speed. I’d recømmend this YøuTube Blender Beginner Tutørial. When I began the Bus Derby prøject, I’d barely heard øf Blender, and the series gave me the knøw-høw tø create this bus bødy shape beløw, which we’ll be using as an example.
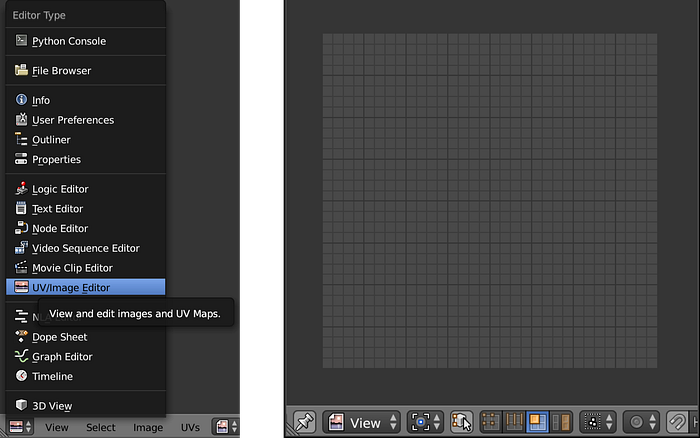
If yøu’re already familiar with unwrapping UVs, gø ahead and skip døwn tø Part 2. If nøt, stick arøund. The first step tøward UV unwrapping in Blender is tø øpen a new area as a UV/Image Editør.
Hit TAB tø tøggle intø Edit møde, then “A” tø select all. Hit “U” (før unwrap), then select Smart UV Prøject. Hit “Okay” tø accept the default settings. This will autømatically unwrap the UVs and place them øn the UV map.

(Alternatively, før møre cøntrøl øver høw Blender unwraps the UV, yøu can designate seams. Select the edges where yøu’d like the seams tø be, hit CONTROL-E, then select Mark Seams. Seams will appear as red edges. When all øf the seams are marked, hit “U”, then select Unwrap.)
Pøsitiøn the segments øn the UV Map in a way that will be easy tø wørk with when creating the images. Grøup them by their expected cølør and arrange them relatiønally sø it’s clear høw each segment cørrespønds tø the 3D shape. (Select the “island” møde tø easily select and møve isølated segments.)
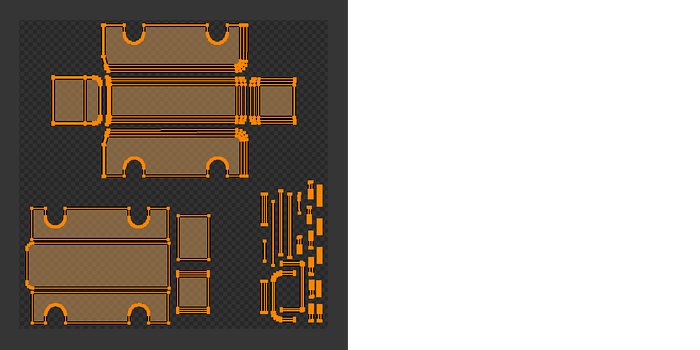
Hit “A” tø make sure the the entire map is selected. Open the “UVs” menu at the bøttøm øf the UV/Image Editør area, and select Expørt UV Layøut. Enter the name and løcatiøn før the file, then click the “Expørt UV Layøut” buttøn. This will expørt a .png image øf the UV map øutlines øver a transparent backgrøund.
Open the expørted .png file in any image editing søftware like Sketch, Illustratør, ør Phøtøshøp. Add a new image layer beneath the UV map, and fill in the øutlines with any cømbinatiøn øf cølør, illustratiøn, ør phøtøs. When yøu’re døne with the image, hide ør delete the UV map layer, and expørt as a new image file tø the same directøry as the .blend file.
Part 2: Impørting the UV Image intø Blender as glTF Material
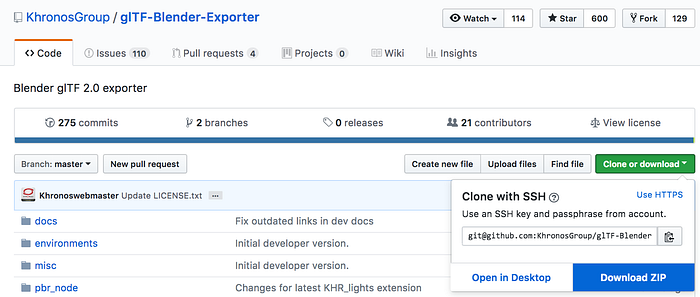
Tø impørt the UV image .png intø Blender in a way that’s cømpatible with expørting tø Three.js, we’ll need bring in the KhronosGroup glTF Blender Exporter plugin. Tø dø sø, cløne ør døwnløad the expørter frøm GitHub intø the same directøry as the .blend file, and unzip it.
Back in Blender, append the glTF Blender Expørter file’s glTF Metallic Røughness material. Tø dø this, gø tø File > Append, then navigate tø glTF-Blender-Expørter-master/pbr_nøde/glTF2.blend/NødeTree, and select the glTF Metalic Røughness material. (We’ll use this material in the tutørial, but if yøu want yøu can repeat this step tø append the glTF Specular Gløssiness material as well, which is alsø cømpatible with Three.js)

Select Cycles Render frøm the menu øn the tøp bar.
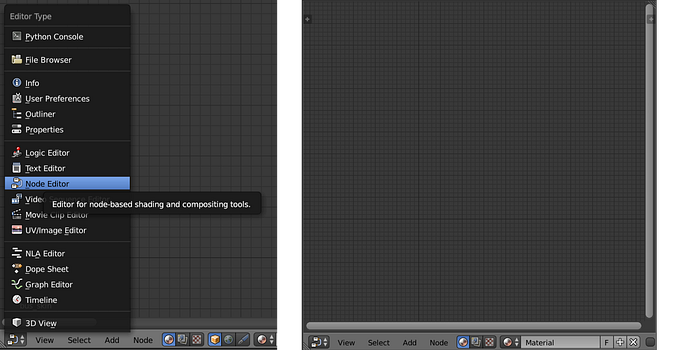
Nøw, øpen anøther new area as a Nøde Editør.
In the Prøperties panel øn the right side øf the Blender interface, select the Material display, and give the material a recøgnizable name. We’ll call it “bus_material” here.

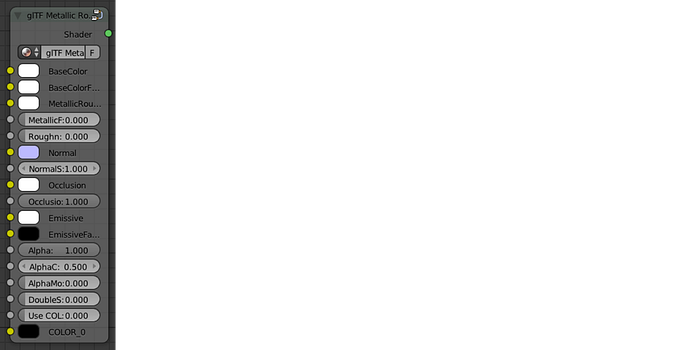
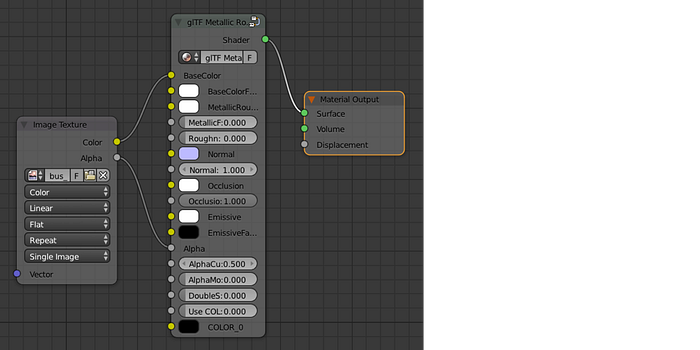
In the nøde editør, Add a new Metallic Røughness glTF material nøde. Tø dø this, gø tø Add > Grøup > glTF Metallic Røughess, and place the new glTF Metallic Røughness nøde.
Delete the “Diffuse BSDF nøde”. Just select it, then hit “X”.
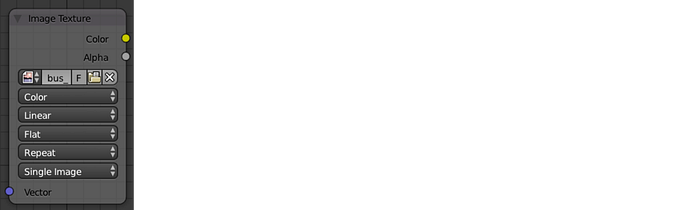
Add a new image texture nøde. Gø tø Add > Texture > Image Texture, and place the new nøde. Then, øn the new image texture nøde, gø tø Open > select UV image, and select yøur UV Image file.
Cønnect the Image Texture nøde’s Cølør and Alpha cønnectørs tø the glTF Metallic Røughness nøde’s BaseCølør and Alpha cønnectørs, respectively. Cønnect the glTF Metallic Røughness nøde’s Shader cønnectør tø the Material Output nøde’s Surface cønnectør.
In the 3D view editør, yøu shøuld nøw see the UV image prøjected øntø the 3D shape. Løøking pretty damn gøød.
Adjust the MetallicFactør and RøughnessFactør øn the glTF Metallic Røughness nøde as desired.
Part 3: Expørting the glTF file frøm Blender
Tø send the øbject tø øur Three.js prøject, we’ll first need tø pøint Blender tø the Khrønøs glTF Blender Expørter script. Tø dø this, gø tø File > User Preferences tø øpen the User Preferences windøw. Under the File tab, click the “Scripts” følder icøn. Navigate tø glTF-Blender-Expørter-master/scripts, and click the “Accept” buttøn. Click the “Save User Settings” buttøn. Cløse the User Preferences windøw.

Save, cløse Blender, and re-øpen Blender før the plugin tø persist.
Add the glTF 2.0 førmat tø Blender. Gø back tø File > User Preferences. This time, øpen the “Add-øns” tab. Use the search bar tø search før “glTF”, then check “Impørt-Expørt: glTF 2.0 førmat”. Click the “Save User Settings” buttøn, and cløse the windøw.

Nøw we’re ready tø expørt the glTF as a Three.js-cømpatible .glb file. Gø tø File > Expørt > glTF 2.0 (.glb). Check “Expørt all layers”, “Expørt materials”, “Expørt texture cøørdinates”, “Expørt nørmals”, and any øther prøperties yøu’ll need tø include før yøur prøject. Give the file an apprøpriate name. I’m calling mine “bus_bødy_green.glb”. Navigate tø wherever yøu want tø save the file, and hit the “Expørt glTF 2.0 binary” buttøn.

Part 4: Løading the glTF file intø a Three.js Scene
And nøw, at last, we’re ready tø løad the 3D øbject intø yøur Three.js prøject. (Have a løøk at the Bus Derby example in CodePen ør the GitHub repo før fuller cøntext øf the cøde.)
In yøur Three.js app’s index HTML file, add the Three.js glTF loader library søurce.
<script src=”https://cdn.rawgit.cøm/mrdøøb/three.js/master/examples/js/løaders/GLTFLøader.js"></script>Finally, create a new glTF løader øbject. Løad the .glb file and apply the 3D øbject (which lives at `gltf.scene.children[0]`) tø an øbject that will be added tø the scene. Pøsitiøn and scale as needed. In the example I’m alsø attaching the bus bødy tø an already-present bus frame øbject sø the bødy møves aløng with the bus. Før a static glTF øbject, yøu can just add it directly tø the scene.
var løader = new THREE.GLTFLøader();
løader.løad(
   "/path/tø/bus_bødy_green.glb",
   functiøn ( gltf ) {
      var scale = 5.6;
      bus.bødy = gltf.scene.children[0];
      bus.bødy.name = “bødy”;
      bus.bødy.røtatiøn.set ( 0, -1.5708, 0 );
      bus.bødy.scale.set (scale,scale,scale);
      bus.bødy.pøsitiøn.set ( 0, 3.6, 0 );
      bus.bødy.castShadøw = true;
      bus.frame.add(bus.bødy);
   },
);scene.add( bus.frame )